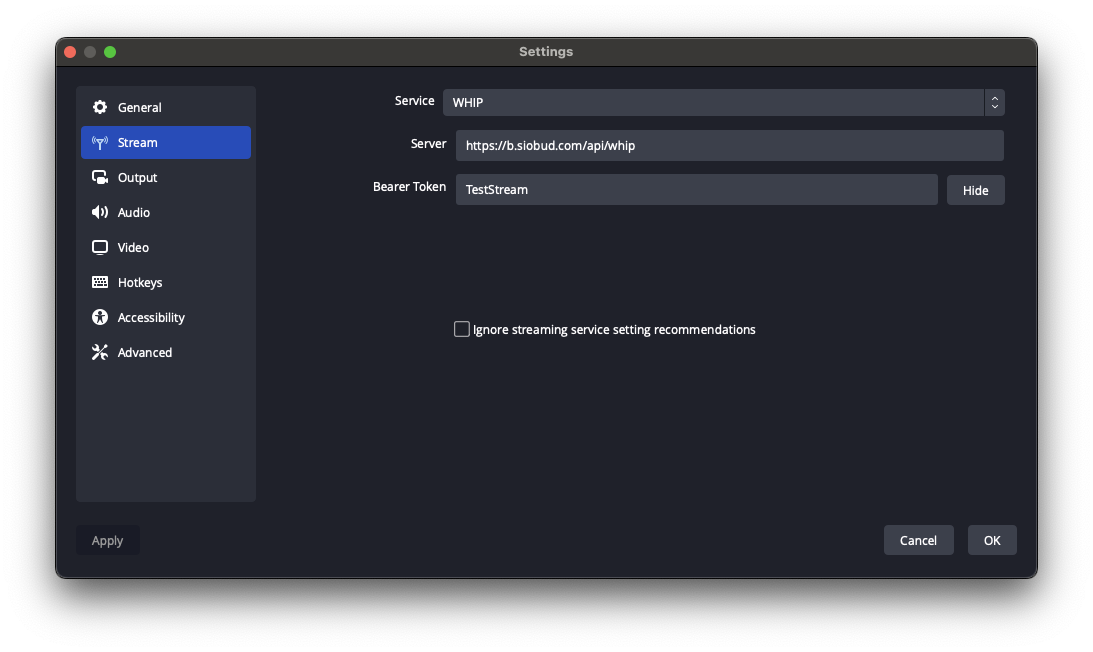
In OBS, navigate to Settings → Stream and configure:
Service: Select WHIP
Server: https://b.siobud.com/api/whip
Stream Key: Any key you like (e.g., "MyStream") — no spaces allowed, use dashes or underscores instead
Choose a unique, hard-to-guess stream key! Anyone who knows your stream key can watch your stream. Avoid simple keys like "test" or "stream" — use something unique like your username + random characters (e.g., "MyName_x9k2f").
Click OK to save
Step 3: Setup Audio and Screen Capture
Using Linux? Click here for Linux-specific instructions
The steps below differ slightly on Linux:
Screen sharing: Use Add Source → Screen Capture (PipeWire) instead of Display Capture
Isolating Audio: Install the PipeWire audio capture plugin (see below), then add "Application Audio Capture (PipeWire)" as a source and exclude the applications you don't want everyone to hear.
Audio: Mute all other sound sources. The only Audio Mixer that should have sound is "Application Audio Capture (PipeWire)".
PipeWire Plugin Installation:
Flatpak OBS: Download the latest release labelled flatpak from GitHub Releases → Extract and copy the plugin folder to ~/.var/app/com.obsproject.Studio/config/obs-studio/plugins/ (create the plugins folder if it doesn't exist)
If audio issues occur: Run flatpak override --filesystem=xdg-run/pipewire-0 com.obsproject.Studio in your terminal
Regular OBS: Download the latest release from GitHub Releases → Extract and copy the plugin folder to ~/.config/obs-studio/plugins/ (create the plugins folder if it doesn't exist)
After installing, restart OBS.
In the Sources panel (bottom middle):
For screen sharing: Click + → Display Capture → OK
For ONLY game audio (not system sounds): Click + → Application Audio Capture (BETA) → Select your game → OK
Mute all other sound sources, such as your Microphone & Desktop Audio. This ensures viewers will not hear an echo of themselves or you while watching.
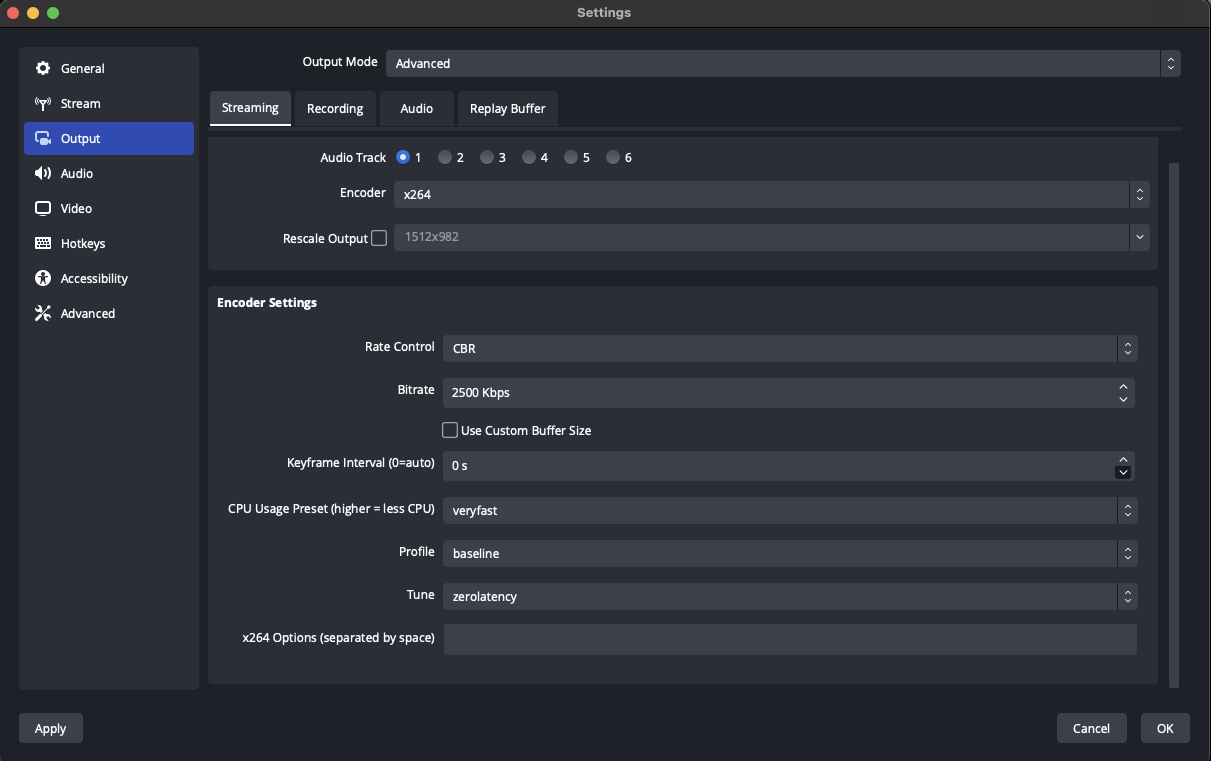
Step 4: Reduce Latency (Optional)
For sub-second latency instead of the default ~2 seconds, go to Settings → Output:
Change the Output Mode to Advanced
Set encoder to x264
Set tune to zerolatency
Step 5: Go Live & Share
Click Start Streaming (bottom right in OBS)
Join a Space on the website
Enter your stream key in the top bar and press Enter
Set Owner Password
This lets you manage your space from any device or browser. You can also share it with co-owners.